In my previous post about installation of cloudflared on pfSense I configured my tunnel using config.yaml and started the tunnel using my cf.sh shell script. A lot has happened since i wrote that post and it’s now possible to configure the tunnel directly from Cloudflares Zero Trust dashboard. This post shows how the tunnel can be configured to connect to a default pfSense installation.
- Create a new tunnel


2. The cloudflared service install command is not supported on FreeBSD at the time of writing, so please press next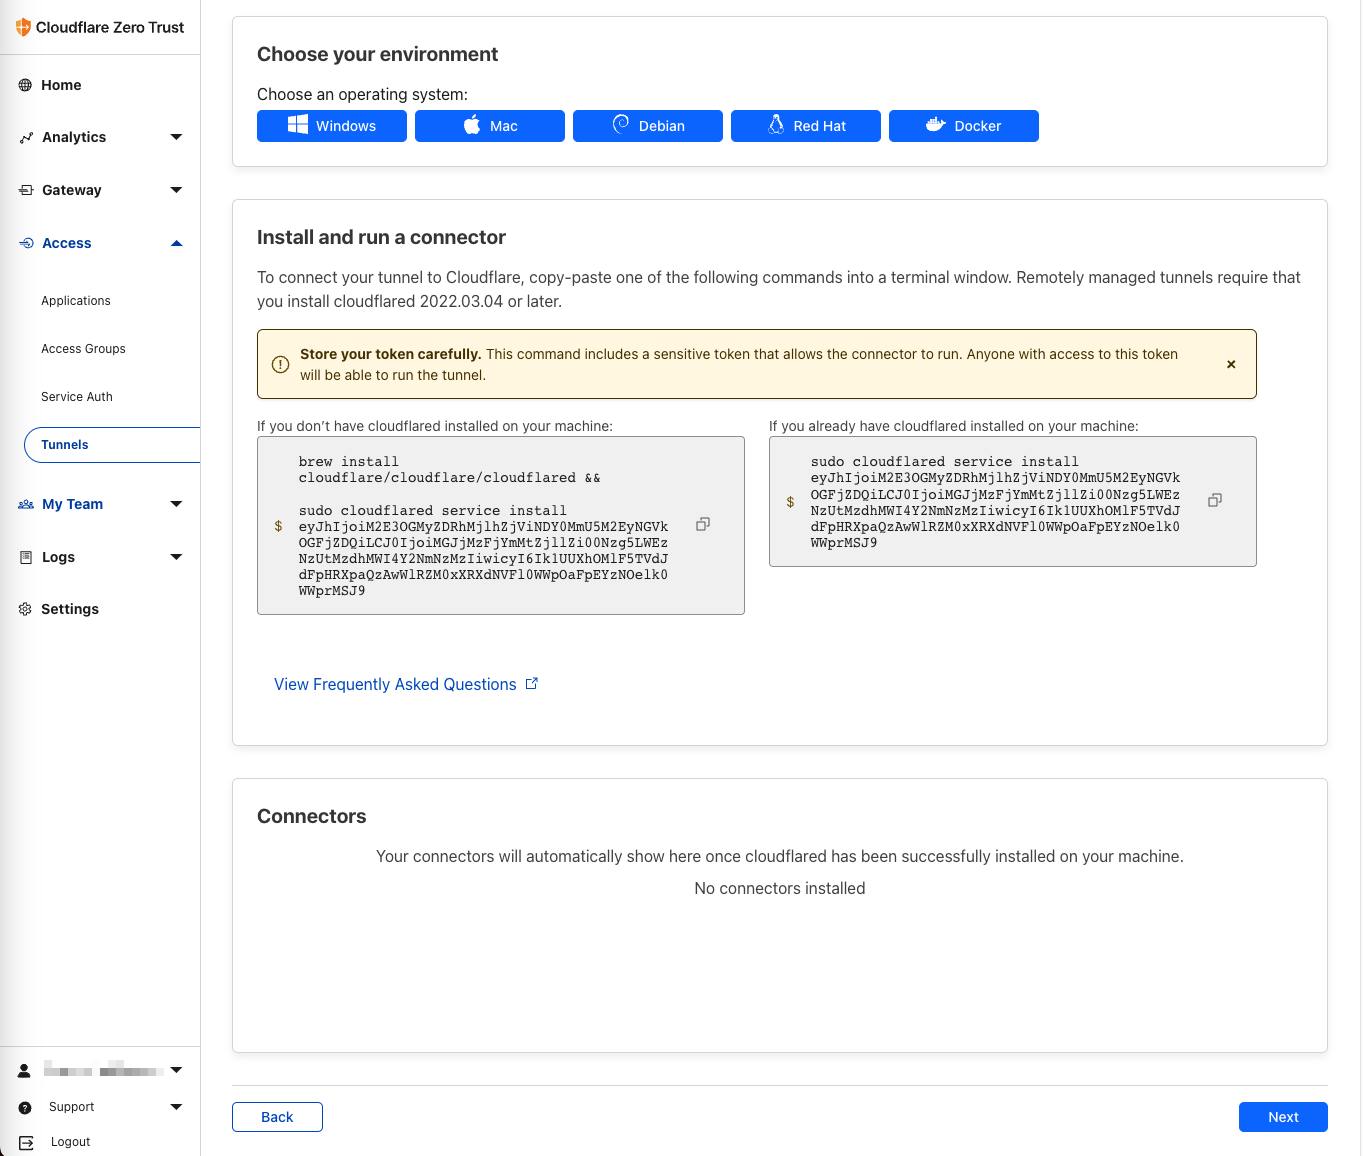
3. Configure your tunnel. In this example the webinterface on my pfsense is using the self-signed certificate on port 443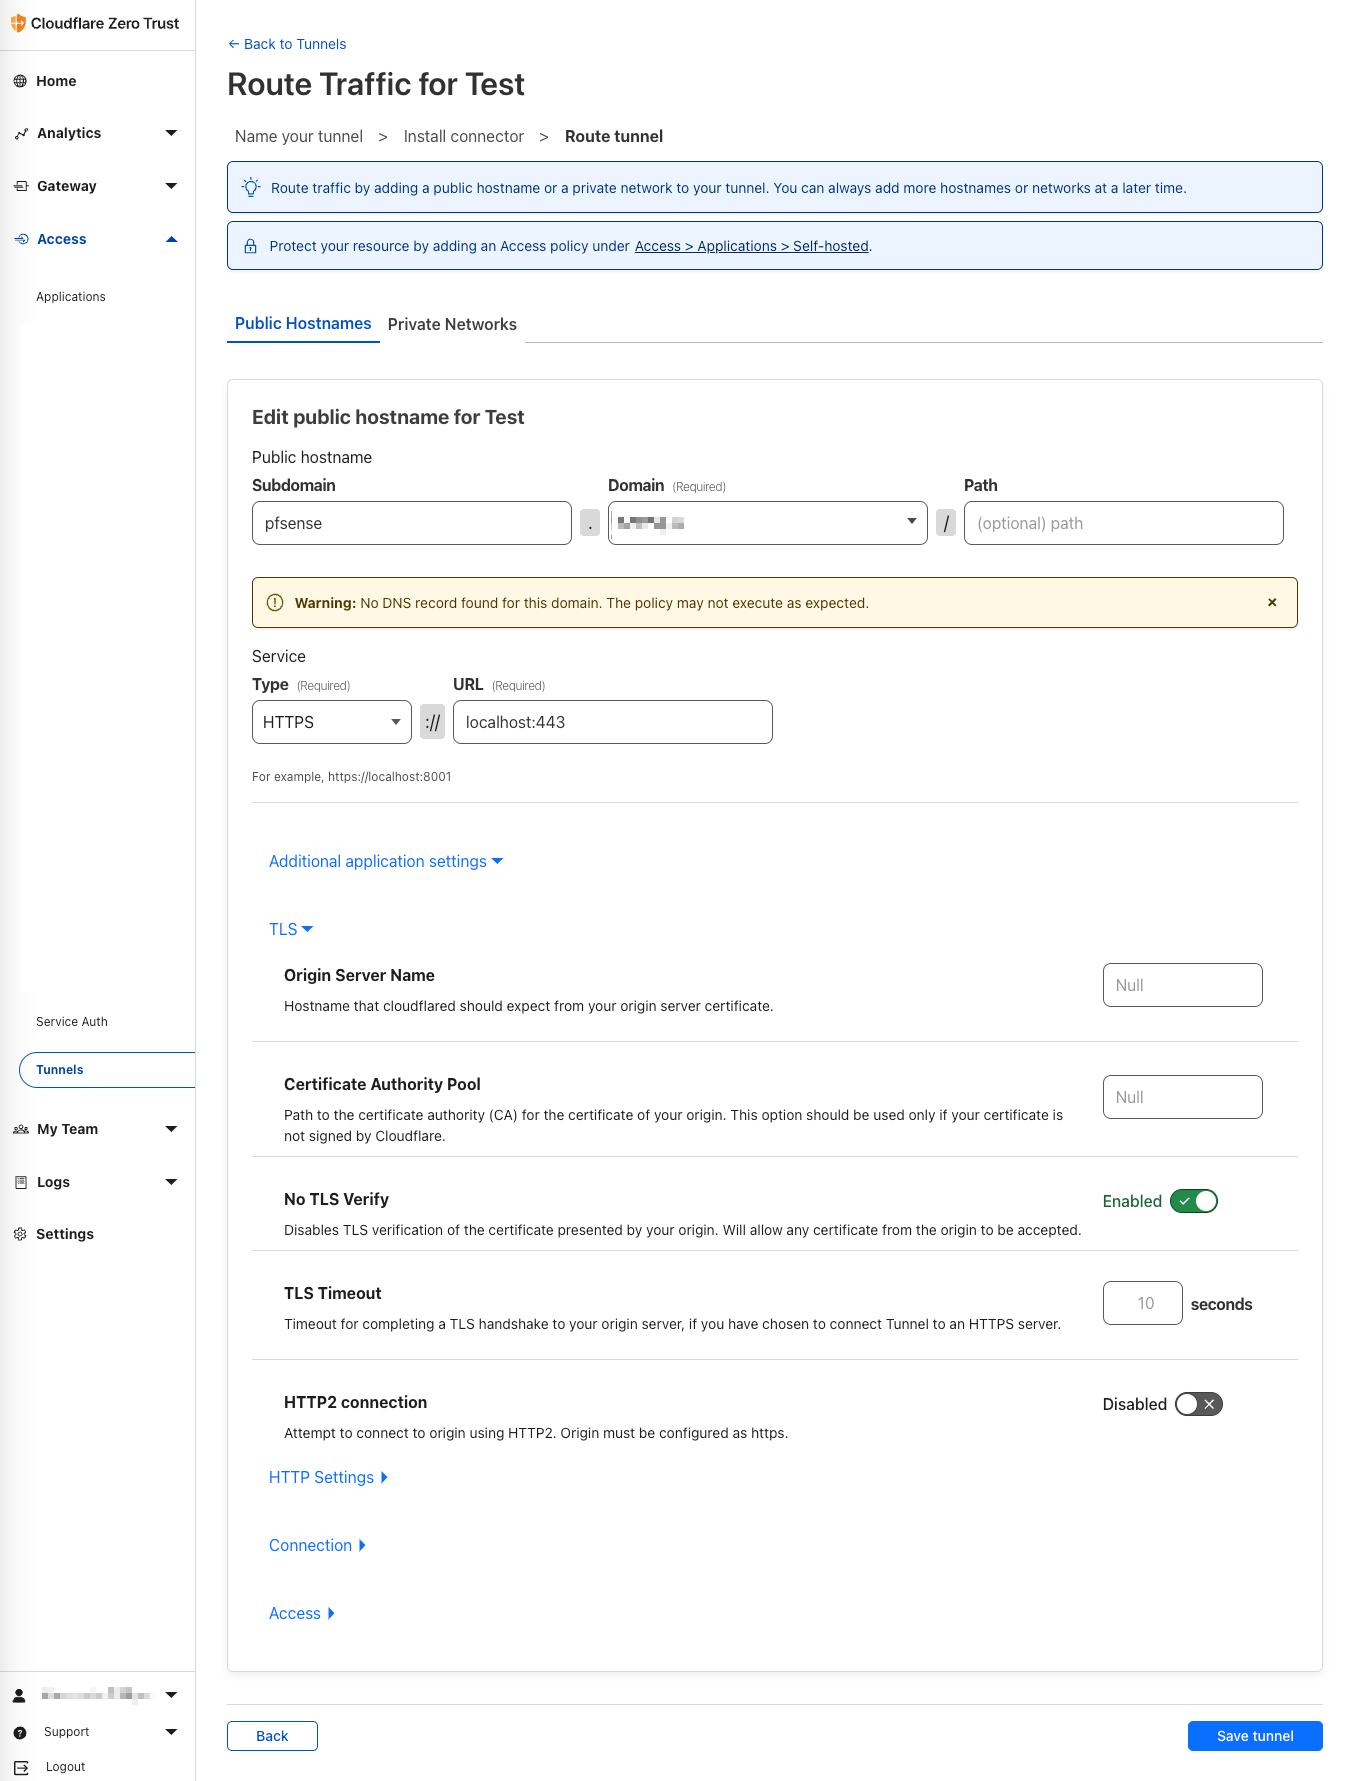
4. The tunnel is now created. Copy the Tunnel-ID
5. Run the tunnel from the pfSense to see if it works and the tunnel gets active. The command can be copied below. Remember to replace Tunnel-ID with your actual ID with the one from step 4
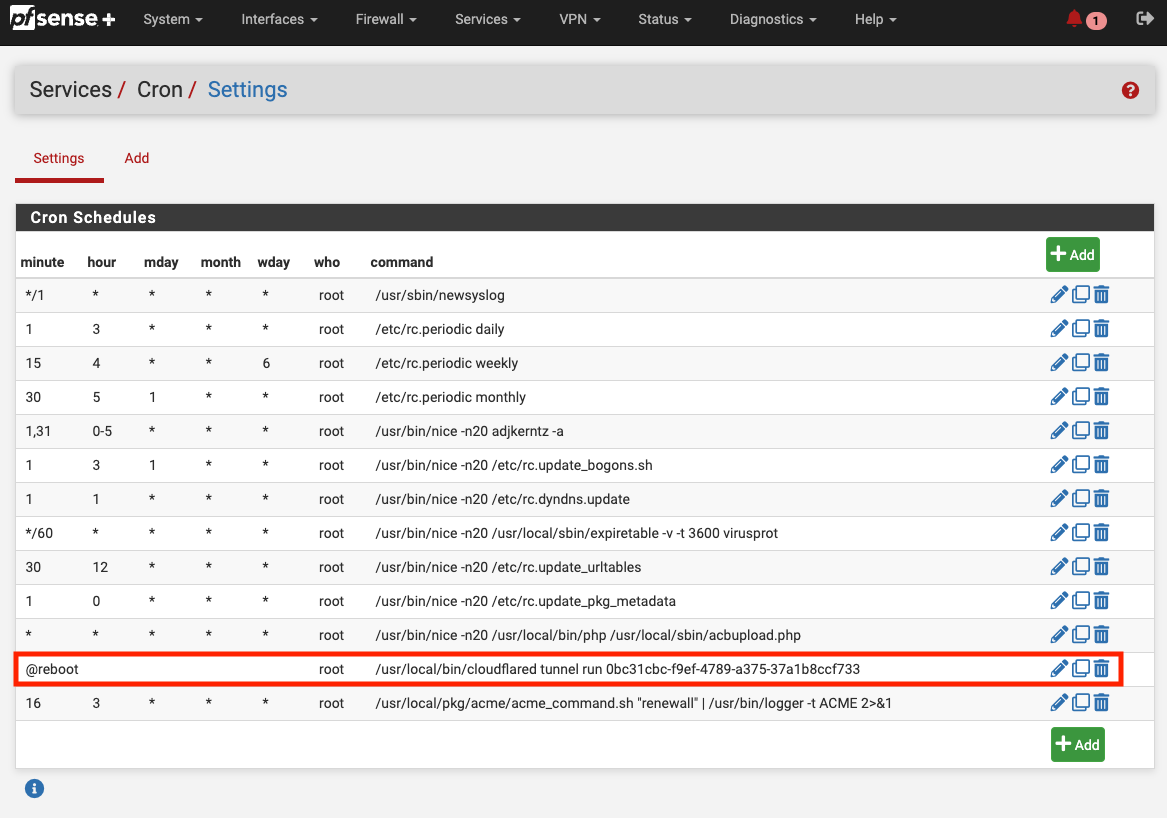
/usr/local/bin/cloudflared tunnel run <Tunnel-ID>
6. I’m still using the pfSense Cron package to make sure the tunnel is being started after a reboot